What are the differences between G5 and G5 FAST?
Minimum Firmware & Software Requirements
DREAM2 Controller - 4.110.907
SAPIR2 Controller - 0.202.603
RF Master G5 - 2.14
RTU RF G5 MODULAR RF Unit - 4.15
RTU RF G5 MODULAR RTU Unit - 4.17
RTU RF G5 ECO - 5.10
RTU RF G5 4 ANA - 3.12
RTU RF G5 SDI - 3.08
Radio Modem - 1.01
WorkBench Software - 1.0.0.103
TreeView - 1.0.0.xx
Controllers - Installation Instructions
Step 1 - Update the DREAM2 Controller to the Beta version V4.110.XXX
Go to the System Manager -> Update -> Update From -> Update beta.

After the update, the firmware should be changed to version 4.110.907 and up.
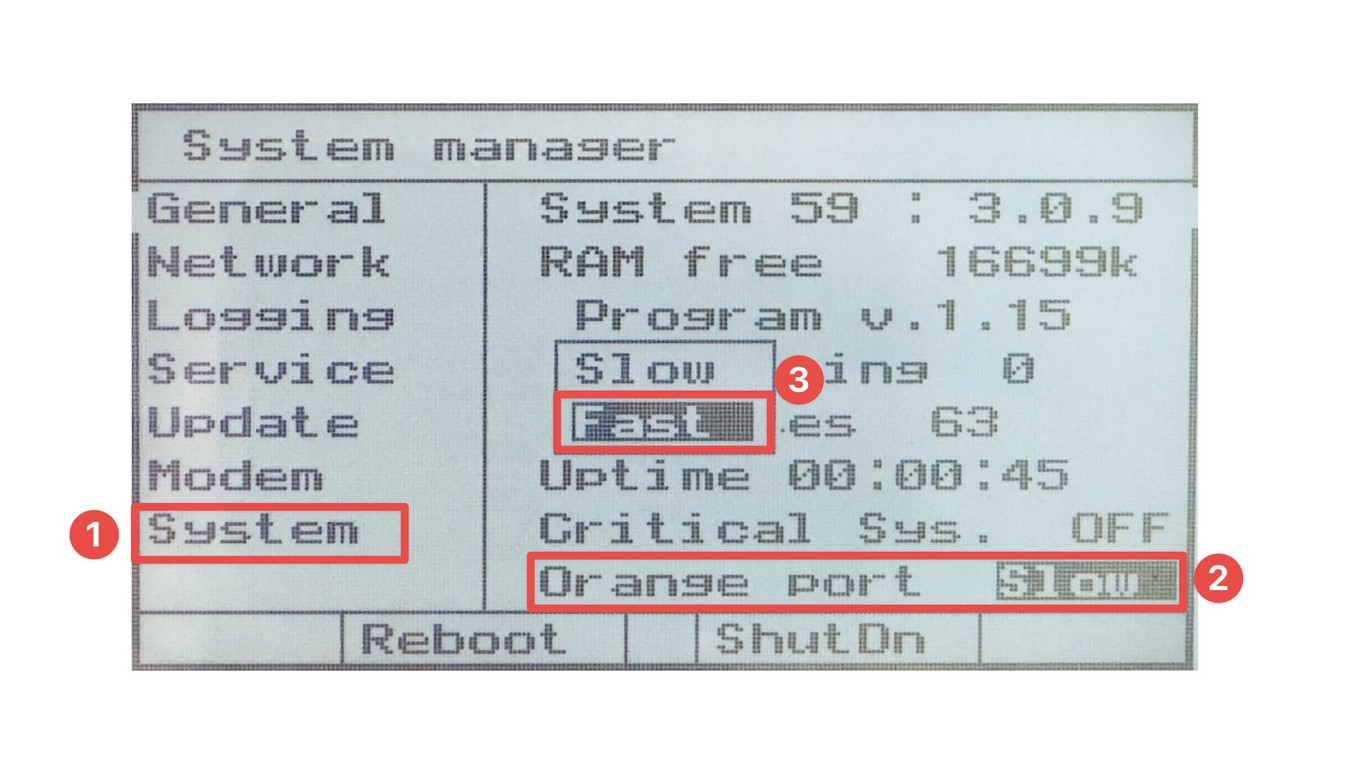
Step 2 - After the restart - Switch the Orange port to work in Fast Mode.
Go to the System Manager -> System -> Orange Port
Change it from 'SLOW' to 'FAST'

Step 3 - Interface Wiring
When the orange port is defined to work in the Fast mode, it is not possible to connect Slow and Fast Interface to the same communication port.
In this mode, the Blue port supports only Slow Interfaces, and the Fast port supports only Fast Interfaces.


Coming Soon!
INTERFACES - Wiring & Configuration Instructions
At this point (November 2023), the supported interfaces are:
Interface AC/DC (REMOTE ONLY) and RF MASTER G5
Configuration:
Please ensure that the firmware version is 2.14 and newer.
By default, the generation of the RF MASTER G5 is 4. When the generation is 4, the mode is Slow.
To change the RF MASTER G5 to work in the Fast mode, use the Workbench PC software and change the generation to 5.
Note: No configuration is required for RTUs.
RTU will automatically change the Generation from 4 to 5 once the connection with RF Master is established,

Wiring Instructions:
Connect the P and N Port to the FAST (ORANGE) Terminal
Connect the + and - to the 12V DC Terminal

For more details on RF G5 MASTER Installation - Please refer to the G5 MASTER IOM.
At this point (November 2023), Interface AC/DC that is connected directly to the Mother Board can work in slow mode only.
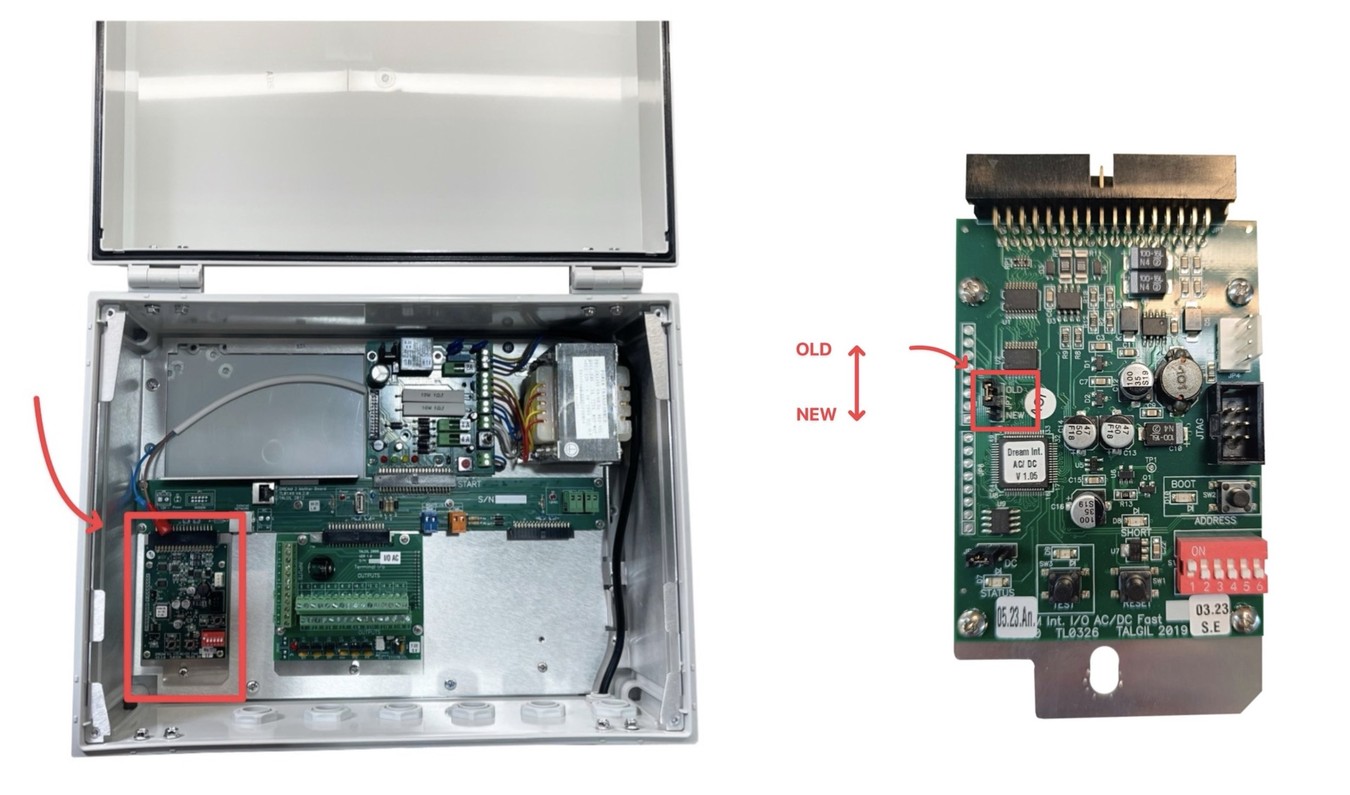
Only remote Interface AC/DC that is connected to the orange port can work in the Fast mode.
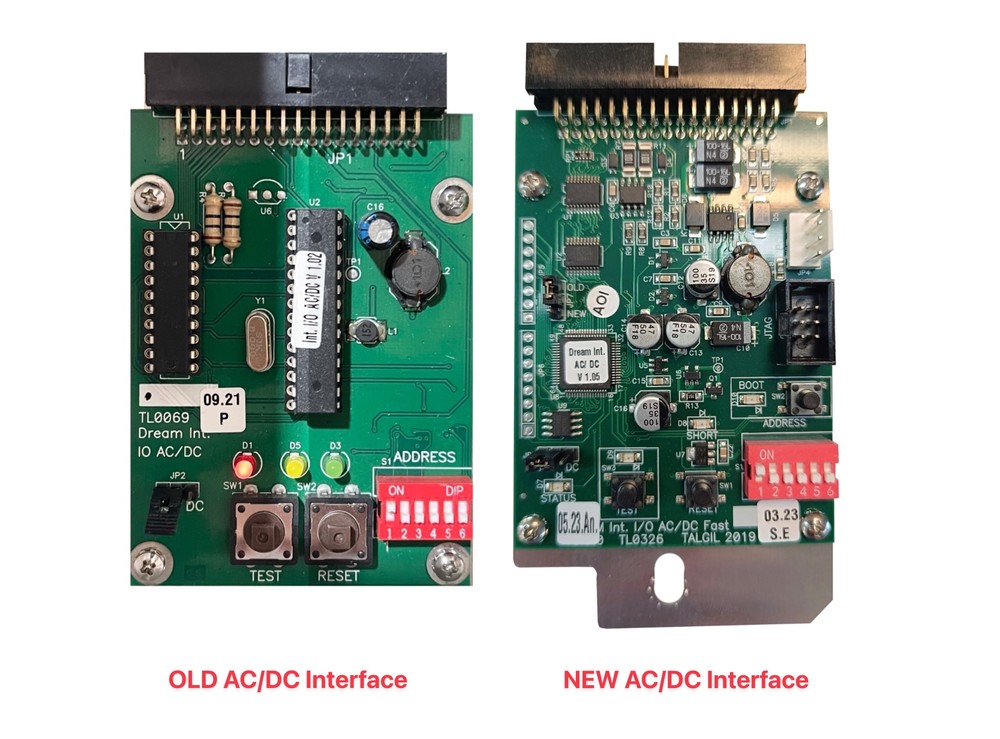
To change the AC/DC Interface - Use the jumper on the left side - to "NEW"

Note - Only newer models of the AC/DC interface are compatible with the G5 FAST system.
Product code for card replacement: TG-INTFASTIO

RTU RF G5 - Wiring & Configuration Instructions
No configuration required - The RTU will automatically change the Generation from 4 to 5 once the connection with RF Master is established.
The only requirement is the firmware version - V5.10.
No configuration required - The RTU will automatically change the Generation from 4 to 5 once the connection with RF Master is established.
The only requirement is the firmware version.
RTU Unit V4.17
RF Unit V4.15
No configuration required - The RTU will automatically change the Generation from 4 to 5 once the connection with RF Master is established.
The only requirement is the firmware version - V3.12
No configuration required - The RTU will automatically change the Generation from 4 to 5 once the connection with RF Master is established.
The only requirement is the firmware version - V3.08
Console Software - Instructions
- To add Interface RF G5 Fast to the Dream 2, download the configuration of the Dream 2 controller to the Image maker as described in the Image below.
- To add Interface RF G5 Fast to the Image maker, add Interface RF G5.
- Select an available address for the RF G5 Interface. In the Dream 2, the address can be 1 to 59.
- To add Interface RF G5 Fast to the Sapir 2, download the configuration of the Sapir 2 controller to the Image Maker.
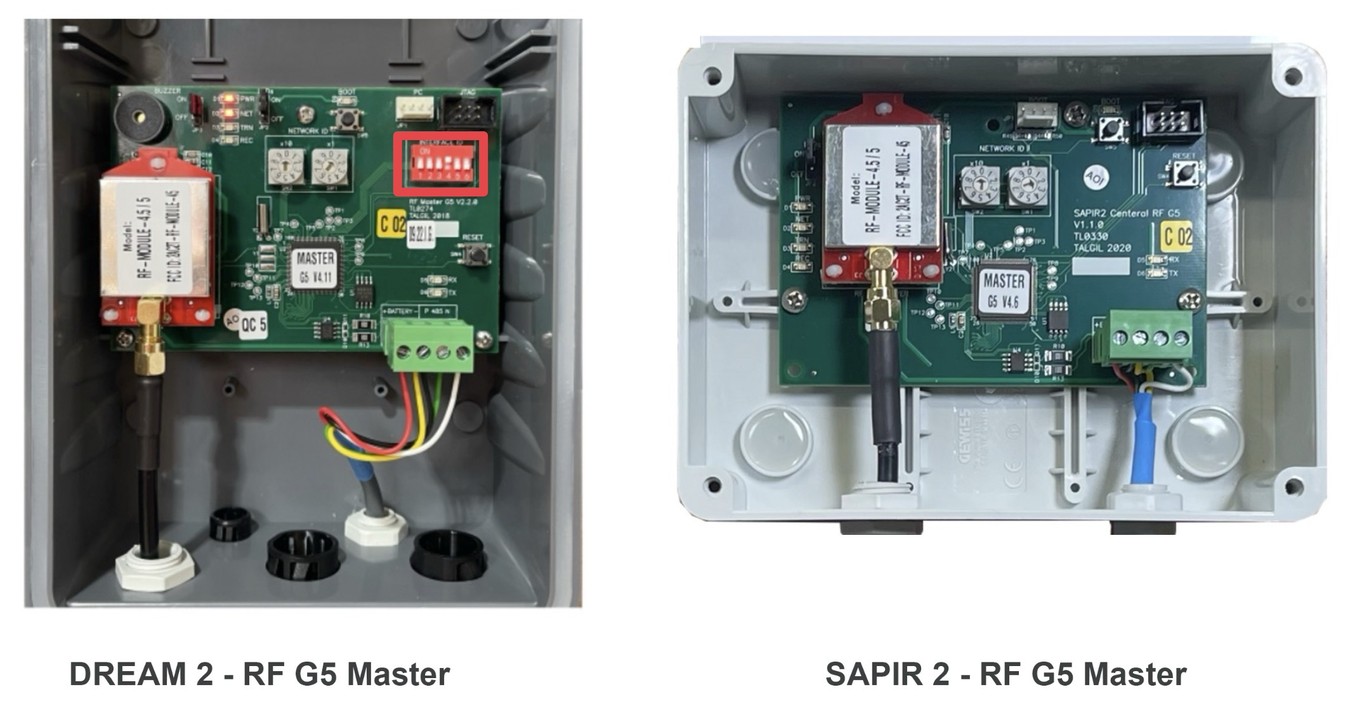
- When the RF MASTER G5 does not have dip switches to set the Address (RF Master for Sapir 2), use Interface address 99 (The address is defined in the firmware version as Address 99. It is a constant address).

DREAM2 Master - Image Configuration


SAPIR2 Master - Image Configuration


