


Talgil Cellular MODEM - Installation Instructions
For a new installation - Follow the steps below:
Note: Make sure the controller is OFF when working on the hardware!
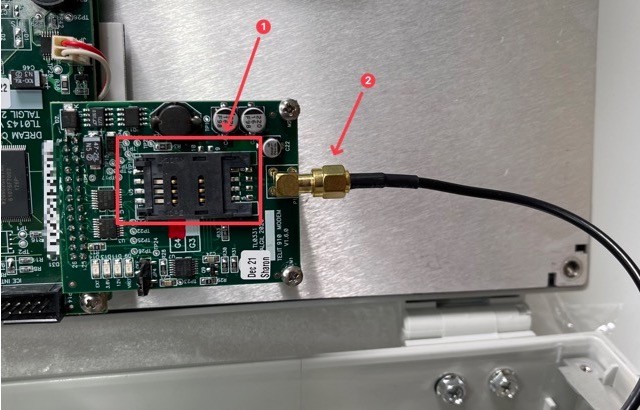
The Sim card modem is located under the screen of the Dream 2 Controller.
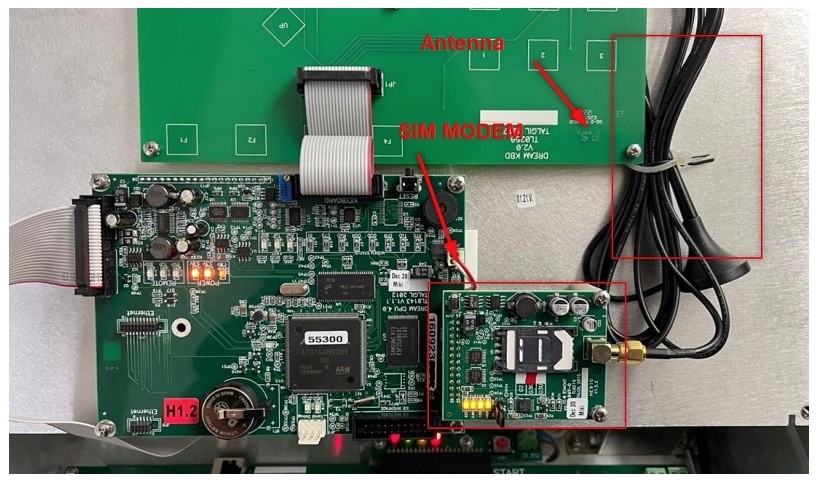
Step 1 - Install the white support legs.
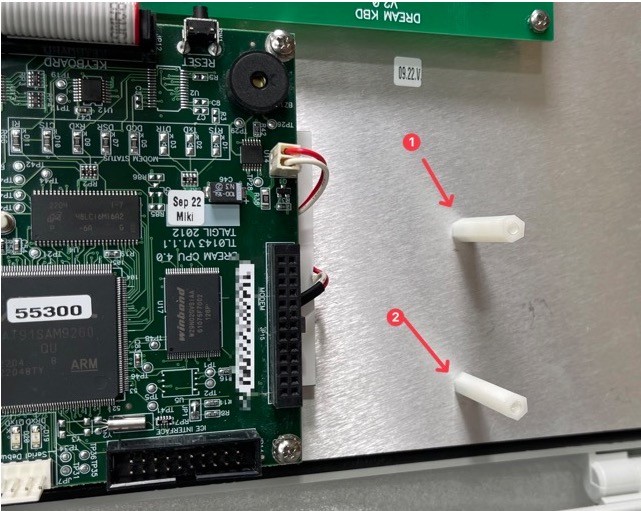
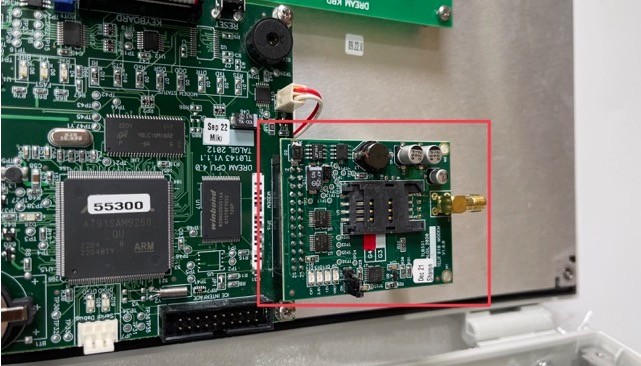
Step 2 - Install the modem as per the image below.
Note: The modem must be facing OUT - As per the image below.
Step 3 - Secure the modem using the provided screws
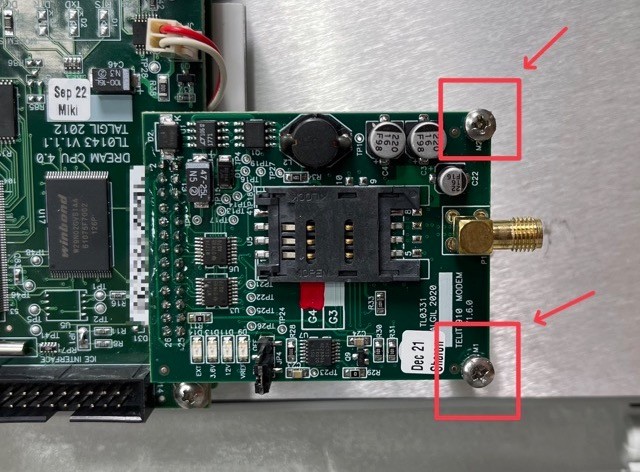
Step 4 & 5 - Install the Antenna & SIM Card
Step 6 - Configure the controller - AS PER INSTRUCTIONS BELOW
Troubleshooting & First set up - HARDWARE
Note: Make sure the controller is OFF when working on the hardware!
- Make sure that the SIM Modem is connected correctly.
- SIM card is installed in the correct position
- The antenna is connected to the modem
- The antenna is in a good position (Outside)
- The switch is on the ON position (LEDs are flashing or are steady ON).
Software - DREAM2 SIM Configuration
If the SIM modem has been replaced with a new one check these settings:
STEP 1 - Go to the SYSTEM MANAGER Menu
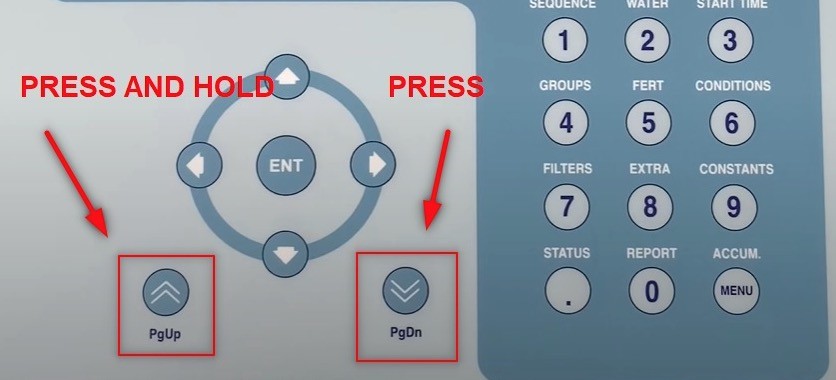
NOTE: To navigate in the SYSTEM MANAGER Menu use the arrows button + ENT button
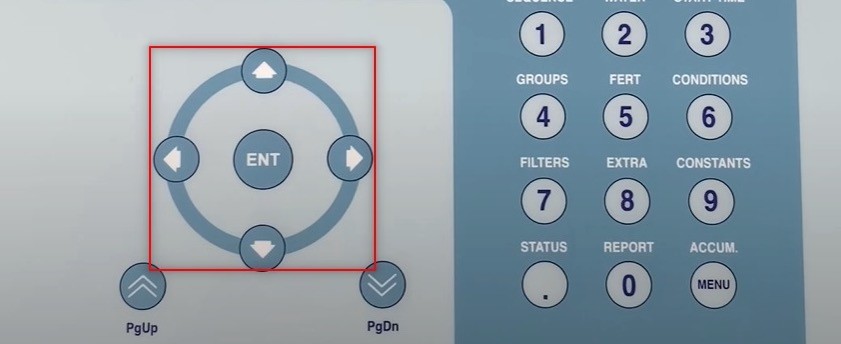
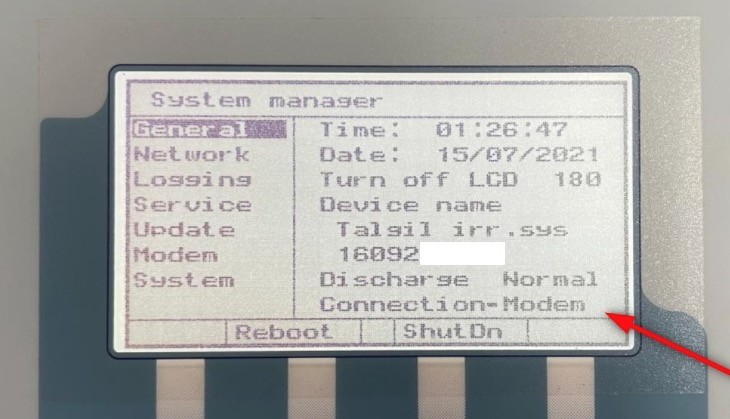
STEP 2 - GENERAL TAB
- Check the Connection - MODEM
Note: If the network is used the connection must be set as NETWORK
Note2: For SIM card Connection use - Connection MODEM
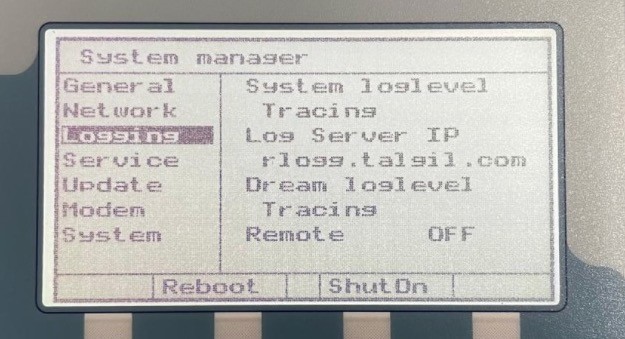
STEP 3 - LOGGING TAB
Double-check the logging configuration
- System loglevel - Tracing
- Log server IP - rlogg.talgil.com
- Dream loglevel - Tracing
- Remote - OFF
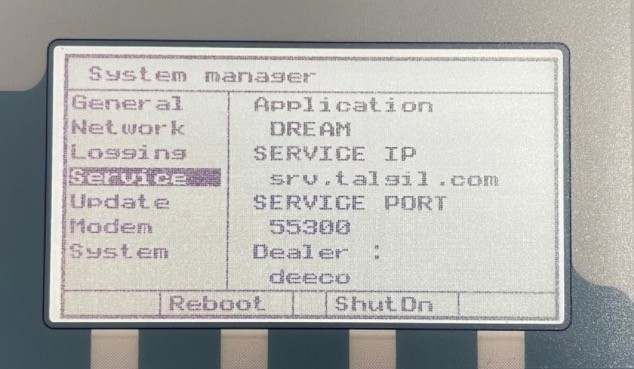
STEP 4 - SERVICE TAB
Correct configuration:
- Application - DREAM
- Service IP - srv.talgil.com
- Service Port - 55300
- Dealer - deeco <--- IMPORTANT!
Note: The dealer must be selected/configured as "deeco" - otherwise the server will not show the controller's status.
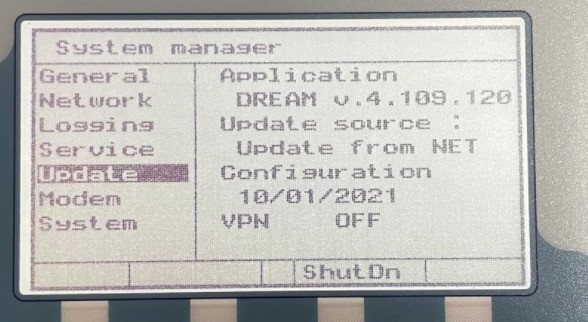
STEP 5 - UPDATE TAB
Correct configuration:
- Update source - Update from NET
Note: Application - DREAM V 4.109.10 is the firmware version
Note 2: The rest is updated automatically once the controller is connected to the server.
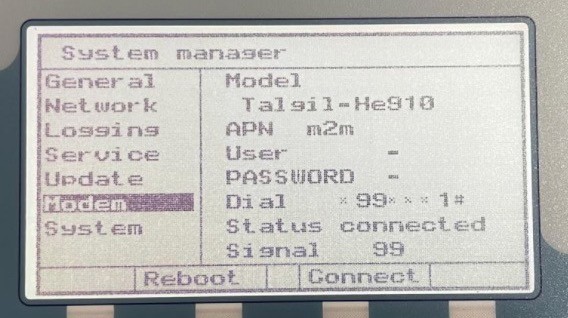
STEP 6 - MODEM TAB
Correct configuration:
- Model - LE910AU (4G modem)
- APN - m2m <--- IMPORTANT!
- User - empty (character "-")
- Dial - Leave default - (*99***1#)
- PASSWORD - empty (character "-")
Note: Dial - Automatically is updated
Note 2: Status - Connected - Automatically updated - The status is showing connection status with the server. (If status = PROVIDER -> Double check the MODEL)
Note 3: Signal - SIM Signal level. (Make sure that the signal is more than 10% if possible).
TROUBLESHOOTING - SIM Configuration
Problem - Status - Provider
Solution - Option 1
- Check the Modem -> Model
- Check the APN -> m2m
- Check the Password -> Empty field
- Check the User -> Empty field
Solution - Option 2
- Check the date -> General -> Date - Update the date..
Check the hardware
- Antenna connection and location
- Sim Card